Netflix의 Eureka를 이용해서 디스커버리 서비스를 구현
클라우드 환경이 되면서 서비스가 오토 스케일링등에 의해서 동적으로 생성되거나 컨테이너 기반의 배포로 인해서, 서비스의 IP가 동적으로 변경.
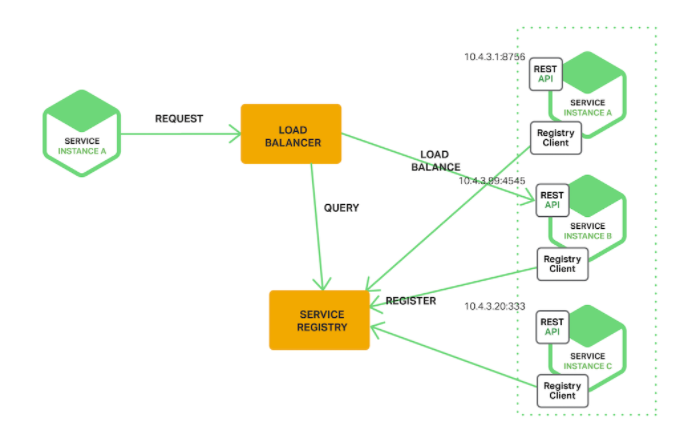
이 때, 서비스 클라이언트가 서비스를 호출할때 서비스의 위치 (즉 IP주소와 포트)를 알아낼 수 있는 기능을 서비스 디스커버리(Service discovery)라고 부름
- 클라이언트 사이드 디스커버리 패턴(Client-Side Discovery Pattern)
- 서비스 인스턴스의 네트워크 위치를 찾고 로드밸런싱하는 역할을 클라이언트가 담당하는 방식

- 서비스 인스턴스의 네트워크 위치를 찾고 로드밸런싱하는 역할을 클라이언트가 담당하는 방식
- 서버 사이드 디스커버리 패턴(Server-Side Discovery Pattern)
- 서버 쪽에서 디스커버리 로직을 구현한 방식
- 서버 쪽에서 디스커버리 로직을 구현한 방식
Eureka 서버와 클라이언트
discovery-service 프로젝트 생성
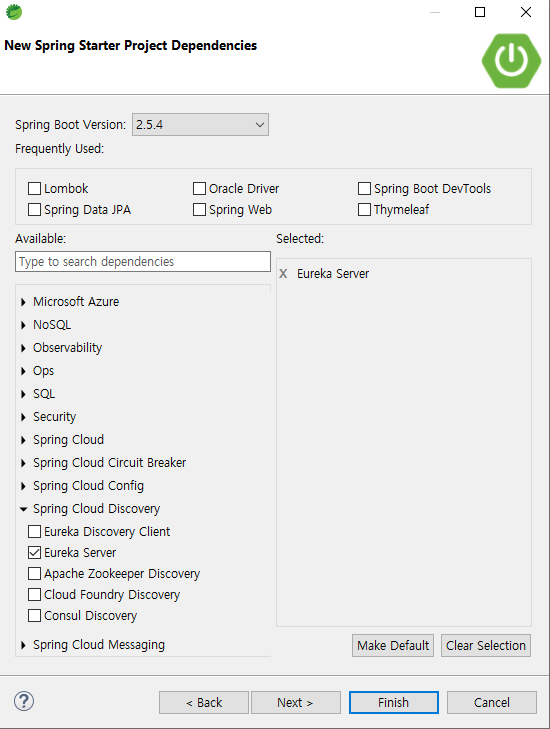
Eureka Server 활성화
#application.yml

server:
  port: 8761

spring:
  application:
    name: discoveryservice

eureka:
  client:
    register-with-eureka: false   # euraka의 registry에 등록할지 여부를 설정, 서버기 때문에
    fetch-registry: false         # registy에 있는 정보를 가져올지 여부를 결정
// aplication.java
package com.example.deliveryservice;
import org.springframework.boot.SpringApplication;
import org.springframework.boot.autoconfigure.SpringBootApplication;
import org.springframework.cloud.netflix.eureka.server.EnableEurekaServer;
@SpringBootApplication
@EnableEurekaServer
public class Application {
public static void main(String[] args) {
SpringApplication.run(Application.class, args);
}
}실행 Euraka Dashboad 확인
instances currently registered with Eureka를 확인하면 아직 등록된 인스턴스가 없는 것을 확인

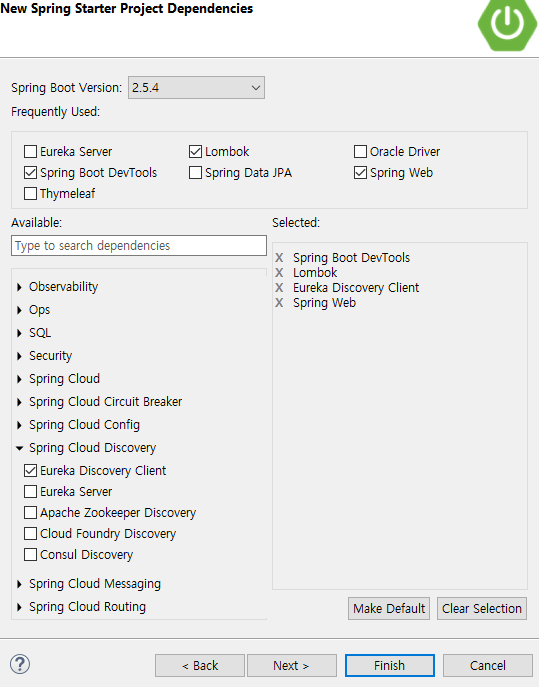
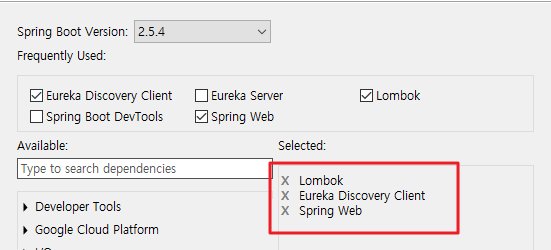
Eureka Client 생성
Eureka Discovery Client와 웹서비스 구현을 위한 dependency 추가
# application.yml 포트번호를 지정

server:
  port: 9001

spring:
  application:
    name: test-user-service

eureka:
  client:
    register-with-eureka: true # 유레카 서버에 자신의 정보를 등록해줘야함
    fetch-registry: true
    service-url:
      defaultZone: http://localhost:8761/eureka
or
# application.yml 랜덤 포트번호 사용

server:
  # 0으로 설정시 유효한 포트로 랜덤 설정함
  # 0으로 여러개 생성시 test-user-service:0 사용하기 때문에 동일한 클라이언트로 식별
  # 랜덤 포트를 사용하는 경우 유레카에서 식별할 수 있는 인스턴스 ID를 재정해 주는 것이 필요
  port: 0

spring:
  application:
    name: test-user-service

eureka:
  client:
    register-with-eureka: true # 유레카 서버에 자신의 정보를 등록해줘야함
    fetch-registry: true
    service-url:
      defaultZone: http://localhost:8761/eureka
  instance:
    instance-id:${spring.application.name}:${spring.application.instance_id:${random.value}}
Eureka Client 활성화
// application.java
package com.example.testuserservice;
import org.springframework.boot.SpringApplication;
import org.springframework.boot.autoconfigure.SpringBootApplication;
import org.springframework.cloud.client.discovery.EnableDiscoveryClient;
@SpringBootApplication
@EnableDiscoveryClient
public class Application {
public static void main(String[] args) {
SpringApplication.run(Application.class, args);
}
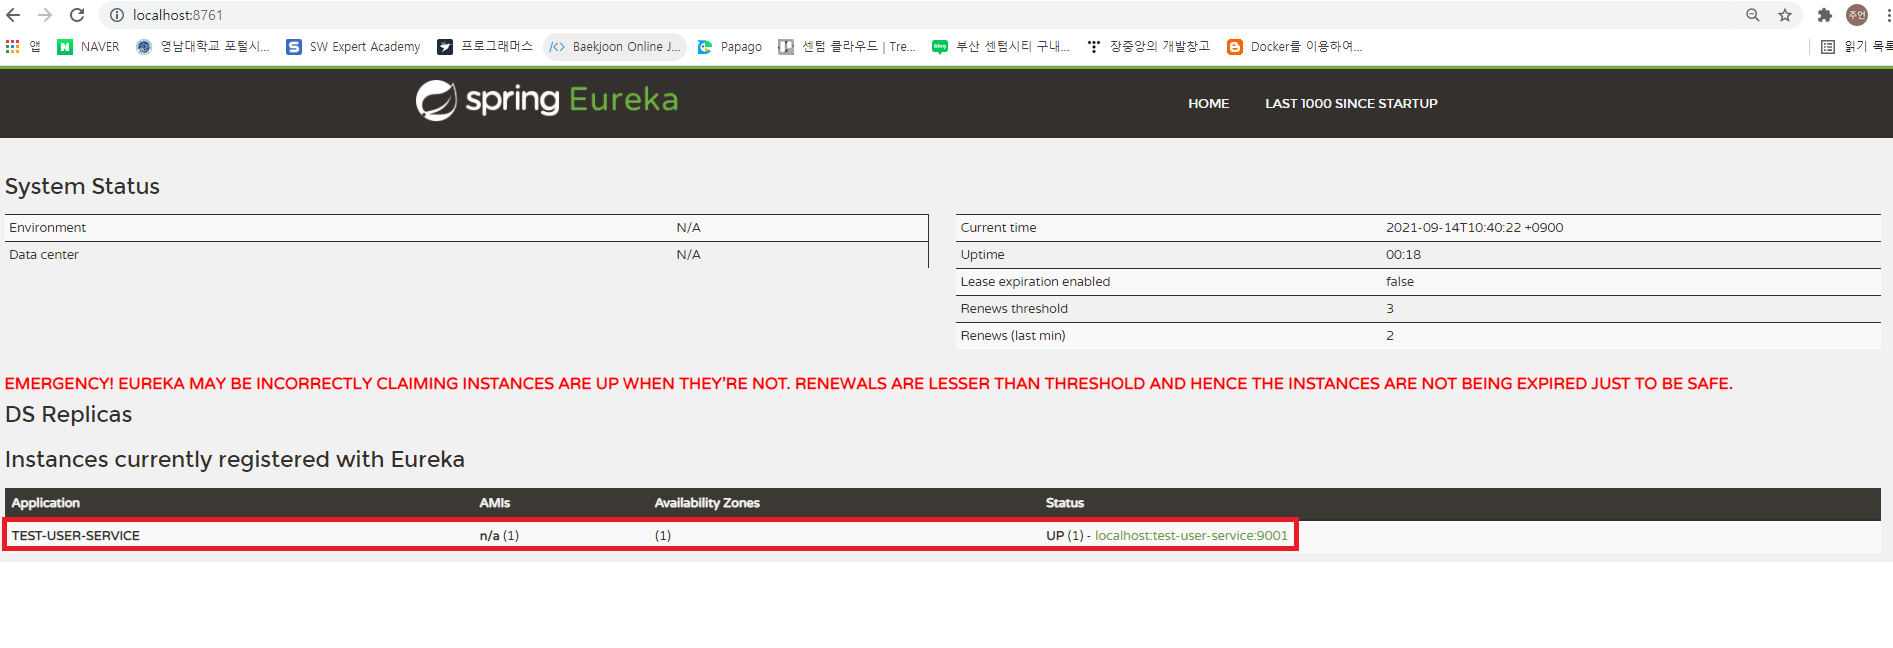
}실행 Euraka Dashboad 확인
instances currently registered with Eureka를 확인하면 application이 추가된것을 확인할 수 있음
* 아래의 EMERGENCY는 정보가 불일치 할 수도 있다는 의미
test-user-service 인스턴스를 하나 더 추가로 실행
같은 프로그램으로 여러개의 인스턴스를 실행 -> port번호 변경
STS Debug/Run Configurations 기능을 이용
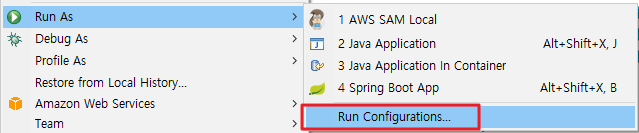
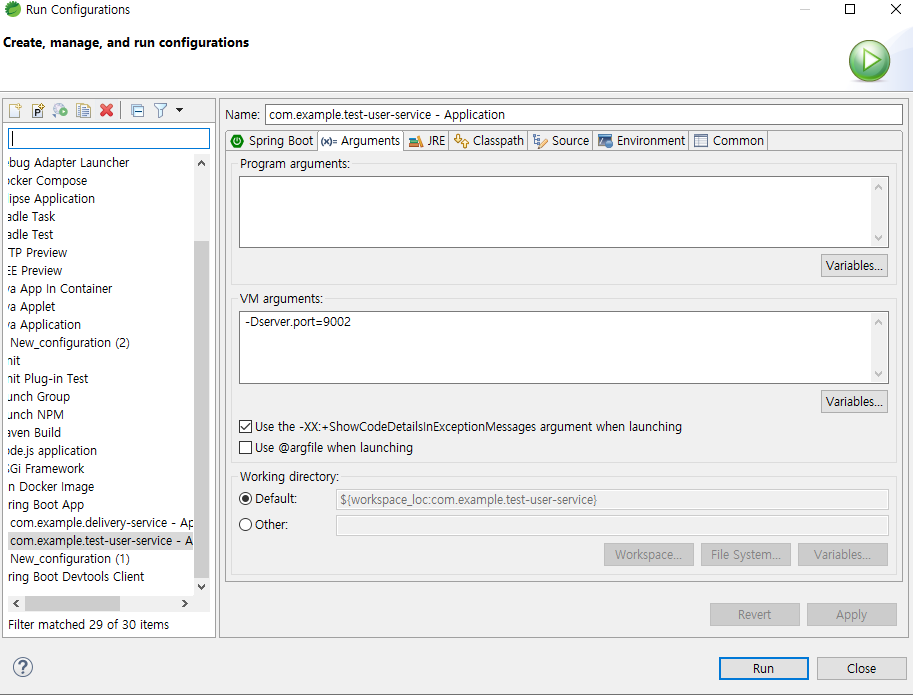
실행시 9001, 9002의 포트로 2개의 인스턴스가 실행중이라는 출력

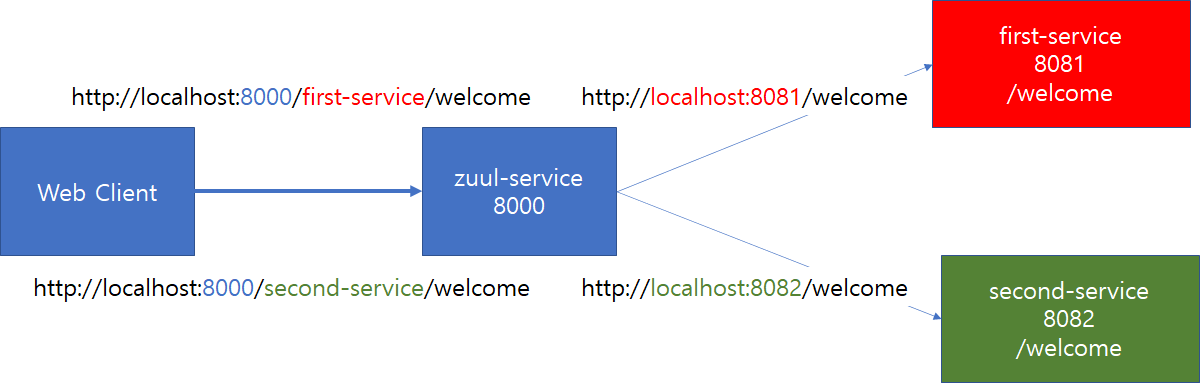
Netflix Zuul을 이용한 API Gateway 구현
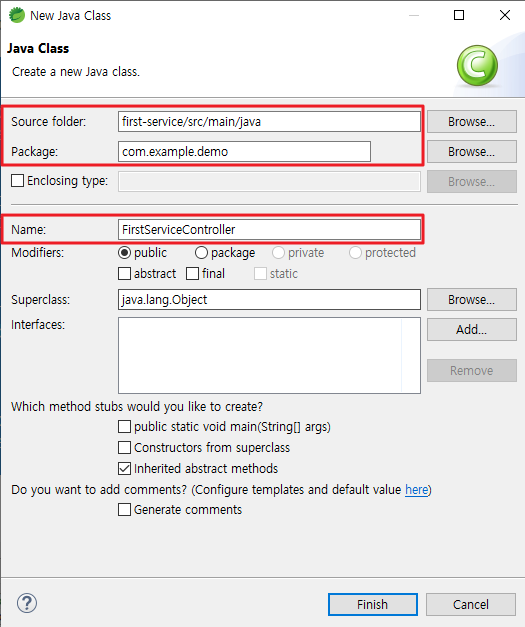
first-service 프로젝트 생성
FirstServiceController 클래스 추가
// FirstServiceController

package com.example.firstservice;

import org.springframework.web.bind.annotation.GetMapping;
import org.springframework.web.bind.annotation.RequestMapping;
import org.springframework.web.bind.annotation.RestController;

@RestController
@RequestMapping("/")
public class FirstServiceController {
	@GetMapping("/welcome")
	public String welcome() {
		return "Welcpme to the First service";
	}
}
application.yml 작성
# application.yml

server:
  port: 8081

spring:
  application:
    name: my-first-service

eureka:
  client:
    register-with-eureka: false
    fetch-registry: false
Second-service 프로젝트 생성
SecondServiceController 클래스 추가
// SecondServiceController

package com.example.secondservice;

import org.springframework.web.bind.annotation.GetMapping;
import org.springframework.web.bind.annotation.RequestMapping;
import org.springframework.web.bind.annotation.RestController;

@RestController
@RequestMapping("/")
public class SecondServiceController {
	@GetMapping("/welcome")
	public String welcome() {
		return "Welcpme to the Second service";
	}
}
application.yml 작성
# application.yml

server:
  port: 8082

spring:
  application:
    name: my-first-service

eureka:
  client:
    register-with-eureka: false
    fetch-registry: false
Netflix ZUUL을 이용해 API Gateway 패턴 구현
zuul-service 프로젝트 생성
porm.xml의 의존성 수정
# porm.xml

<?xml version="1.0" encoding="UTF-8"?>
<project xmlns="http://maven.apache.org/POM/4.0.0" xmlns:xsi="http://www.w3.org/2001/XMLSchema-instance"
	xsi:schemaLocation="http://maven.apache.org/POM/4.0.0 https://maven.apache.org/xsd/maven-4.0.0.xsd">
	<modelVersion>4.0.0</modelVersion>
	<parent>
		<groupId>org.springframework.boot</groupId>
		<artifactId>spring-boot-starter-parent</artifactId>
        #버전 변경
		<!-- <version>2.5.4</version> -->
		<version>2.3.12.RELEASE</version>
		<relativePath/> <!-- lookup parent from repository -->
	</parent>
	<groupId>com.example</groupId>
	<artifactId>com.example.zuul-service</artifactId>
	<version>0.0.1-SNAPSHOT</version>
	<name>com.example.zuul-service</name>
	<description>Demo project for Spring Boot</description>
	<properties>
		<java.version>11</java.version>
	</properties>
	<dependencies>
		<dependency>
			<groupId>org.springframework.boot</groupId>
			<artifactId>spring-boot-starter</artifactId>
		</dependency>

		<dependency>
			<groupId>org.springframework.boot</groupId>
			<artifactId>spring-boot-starter-test</artifactId>
			<scope>test</scope>
		</dependency>
		#zuul 의존성 추가
		 <!-- https://mvnrepository.com/artifact/org.springframework.cloud/spring-cloud-starter-netflix-zuul -->
        <dependency>
            <groupId>org.springframework.cloud</groupId>
            <artifactId>spring-cloud-starter-netflix-zuul</artifactId>
            <version>2.2.9.RELEASE</version>
        </dependency>


	</dependencies>

	<build>
		<plugins>
			<plugin>
				<groupId>org.springframework.boot</groupId>
				<artifactId>spring-boot-maven-plugin</artifactId>
			</plugin>
		</plugins>
	</build>

</project>
Application 클래스에 zuul활성화
# Application.java
package com.example.zuulservice;

import org.springframework.boot.SpringApplication;
import org.springframework.boot.autoconfigure.SpringBootApplication;
import org.springframework.cloud.netflix.zuul.EnableZuulProxy;

@SpringBootApplication
@EnableZuulProxy
public class Application {

	public static void main(String[] args) {
		SpringApplication.run(Application.class, args);
	}
}
application.yml에 route정보를 추가
# application.yml
server:
port: 8000
spring:
application:
name: my-zuul-service
zuul:
routes:
first-service:
path: /first-service/**
url: http://localhost:8081
second-serivce:
path: /second-service/**
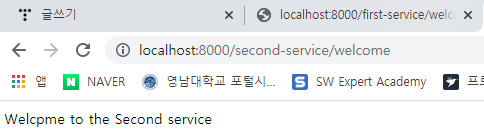
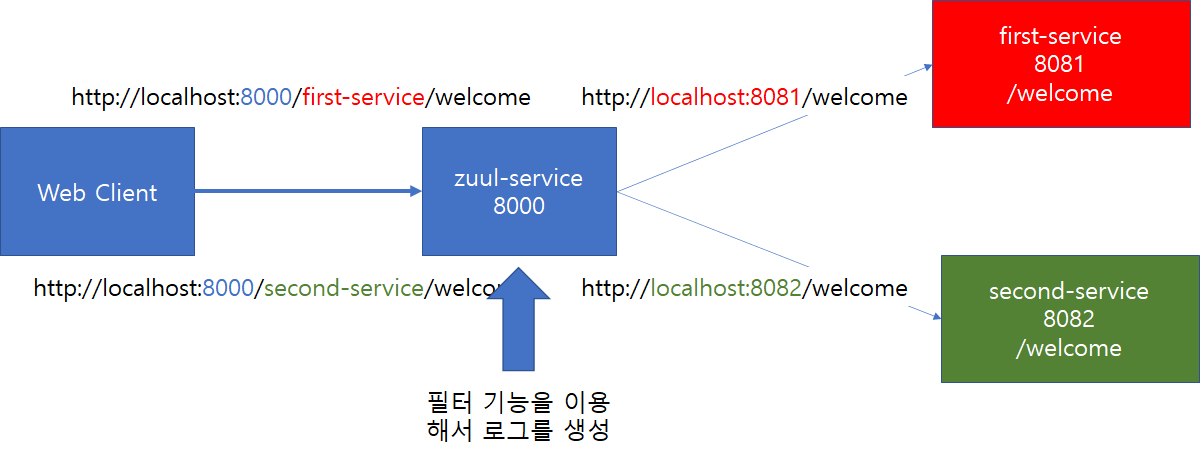
url: http://localhost:8082실행시 8000포트의 zuul-service로 부터 라우팅되는 것을 확인 가능
 |
 |
로그 확인을 위한 Zuul filter
서비스 라우팅 전에 로그를 남기는 필터를 추가
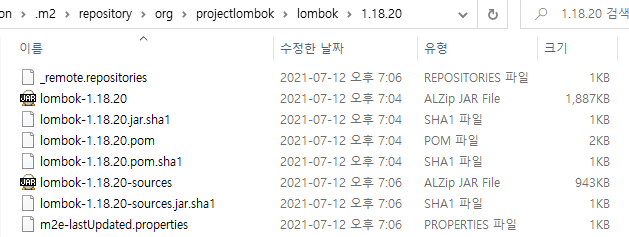
zuul-service 프로젝트의 porm.xml에 lombok 의존성 추가
lombok 설치, 확인
zuul-service 프로젝트에 ZuulLoggingFilter 클래스 생성
// ZuulLoggingFilter

package com.example.zuulservice;

import javax.servlet.http.HttpServletRequest;

import org.springframework.stereotype.Component;

import com.netflix.zuul.ZuulFilter;
import com.netflix.zuul.context.RequestContext;
import com.netflix.zuul.exception.ZuulException;

import lombok.extern.slf4j.Slf4j;

@Slf4j
@Component
public class ZuulLoggingFilter extends ZuulFilter {
	@Override
	public boolean shouldFilter() {
		return true;
	}

	@Override
	public Object run() throws ZuulException {
		log.info("start log >>>>");

		//	요청 URI 정보를 로그에 기록
		RequestContext ctx = RequestContext.getCurrentContext();
		HttpServletRequest request = ctx.getRequest();
		log.info(request.getRequestURI());

		log.info("<<< end log");

		return null;
	}

	@Override
	public String filterType() {
		return "pre";
	}

	@Override
	public int filterOrder() {
		return 0;
	}

}
zuul-service, first-serivce, second-service 실행 후 필터 테스트
first-serivce나 second-service 접속시 로그 필터확인

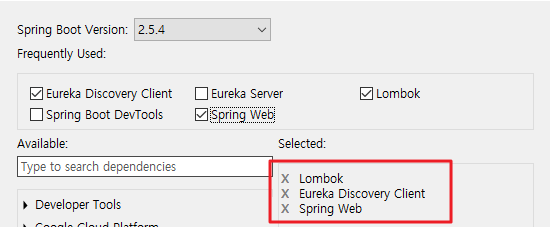
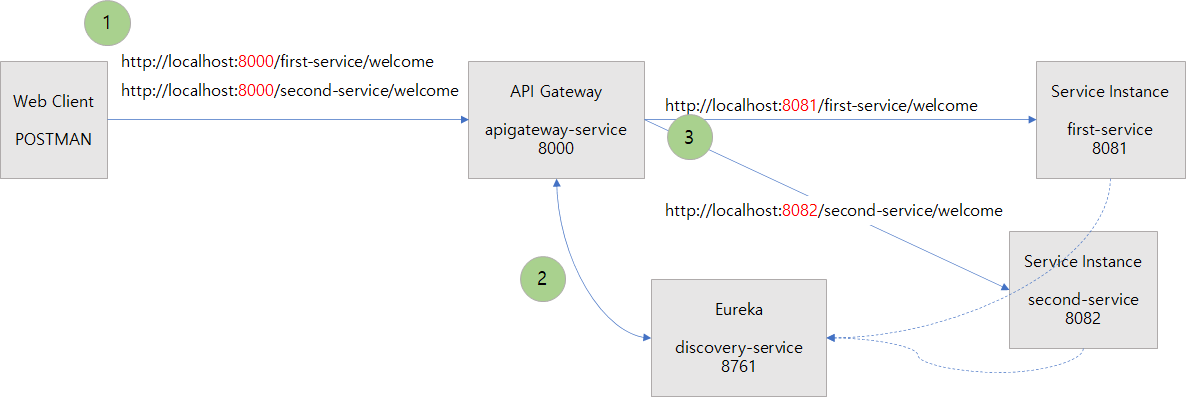
Spring Cloud Gateway를 이용한 API Gateway 패턴을 구현
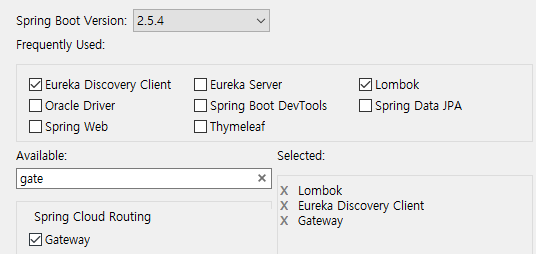
apigateway-service 프로젝트 생성
application.yml 파일 작성
# application.yml

server:
  port: 8000

spring:
  application:
    name: apigateway-service
  cloud:
    gateway:
      routes:
      - id: first-service
        predicates:
        - Path=/first-service/**
        uri: http://localhost:8081
      - id: second-serivce
        predicates:
        - Path=/second-service/**
        uri: http://localhost:8082

eureka:
  client:
    register-with-eureka: false
    fetch-registry: false
    service-url:
      defaultZone: http://localhost:8761/eureka
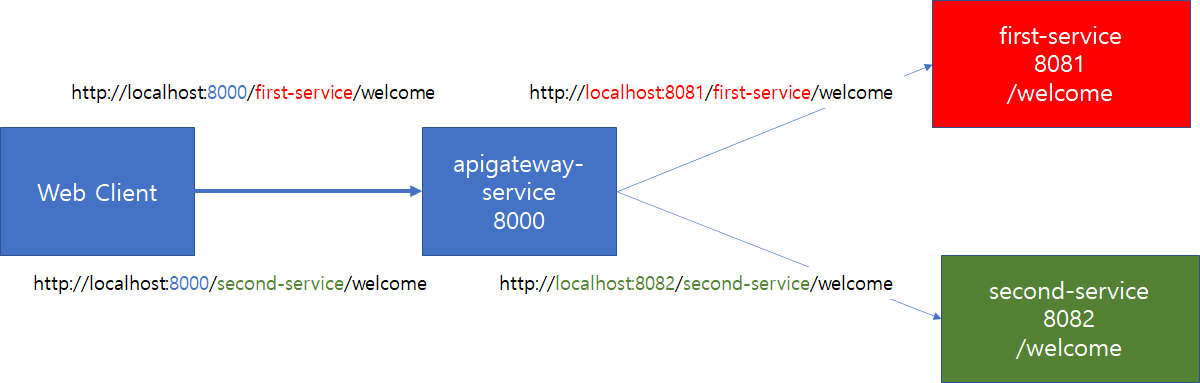
기존의 first-service와 second-service에 대해 요청시 에러발생
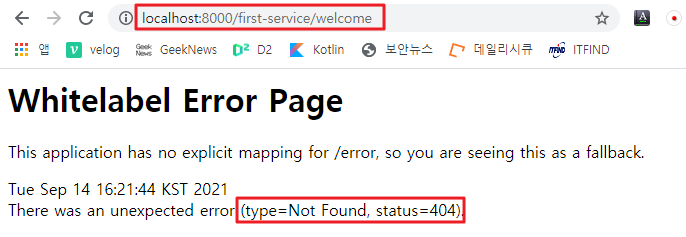
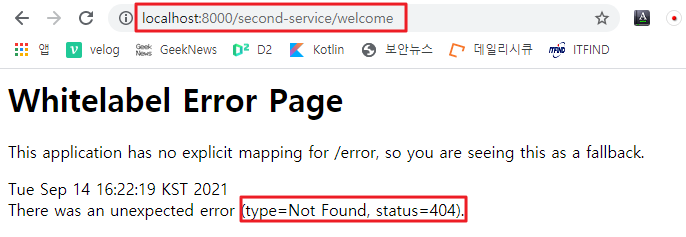
서비스를 구분하기 위해 입력한 주소가 그대로 서비로 라우팅되는 것을 확인할 수 있음 ⇒ 라우팅된 서비스가 동작할 수 있도록 하기위해서 각 서비스에 서비스를 구분하는 정보를 받아들일 수 있도록 수정
first-service와 second-service의 맵핑 정보를 수정
// first-service
package com.example.demo;

import org.springframework.web.bind.annotation.GetMapping;
import org.springframework.web.bind.annotation.RequestMapping;
import org.springframework.web.bind.annotation.RestController;

@RestController
@RequestMapping("/first-service") //수정
public class FirstServiceController {
	@GetMapping("/welcome")
	public String welcom() {
		return "Welcome to the First Service";
	}
}
// second-service
package com.example.demo;
import org.springframework.web.bind.annotation.GetMapping;
import org.springframework.web.bind.annotation.RequestMapping;
import org.springframework.web.bind.annotation.RestController;
@RestController
@RequestMapping("/second-service") //수정
public class FirstServiceController {
@GetMapping("/welcome")
public String welcom() {
return "Welcome to the Second Service";
}
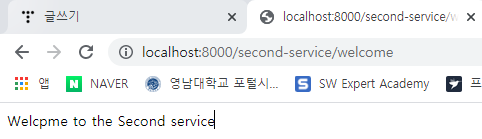
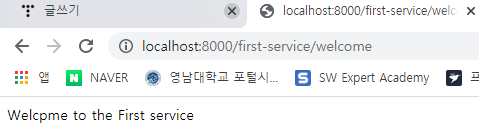
}first-service, second-service를 재기동 후 동작 확인
 |
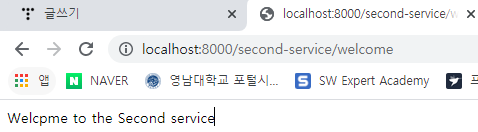 |
* 단, 서비스를 직접 호출할 시에도 서비스 구분을 위해 부여한 경로를 포함해야하는 번거로움이 있음
Filter 1. java code를 이용한 Spring Cloud Gateway Filter
apigateway-service 프로젝트의 application.yml 파일 수정
# application.yml
server:
  port: 8000

spring:
  application:
    name: apigateway-service
#  cloud:
#    gateway:
#      routes:
#      - id: first-service
#        predicates:
#        - Path=/first-service/**
#        uri: http://localhost:8081
#      - id: second-serivce
#        predicates:
#        - Path=/second-service/**
#        uri: http://localhost:8082

eureka:
  client:
    register-with-eureka: false
    fetch-registry: false
    service-url:
      defaultZone: http://localhost:8761/eureka
FilterConfig 클래스 생성 - 라우팅 정보 및 요청/응답헤더 값을 설정
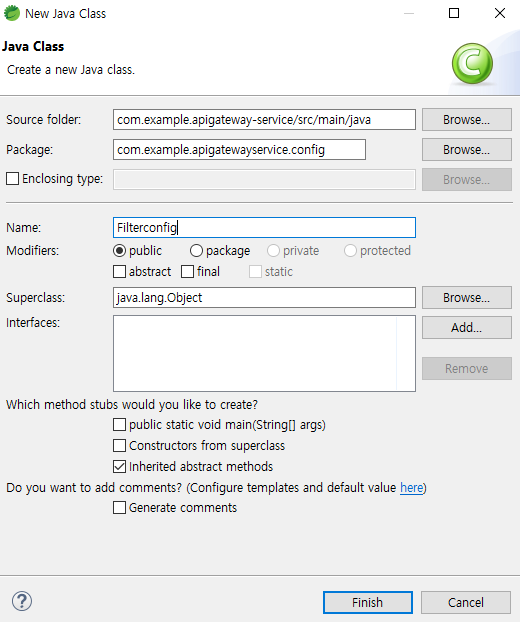
// Filterconfig

package com.example.apigatewayservice.config;

import org.springframework.cloud.gateway.route.RouteLocator;
import org.springframework.cloud.gateway.route.builder.RouteLocatorBuilder;
import org.springframework.context.annotation.Bean;
import org.springframework.context.annotation.Configuration;

@Configuration
public class Filterconfig {
	@Bean
	public RouteLocator gatewayRoutes(RouteLocatorBuilder builder) {
		return builder.routes()
				.route(r->r.path("/first-service/**")
						.filters(f->f.addRequestHeader("first-request", "first-request-header")
								.addResponseHeader("first-response", "first-response-header"))
						.uri("http://localhost:8081"))
				.route(r -> r.path("/second-service/**")
                        .filters(f -> f.addRequestHeader("second-request", "second-request-header")
                                       .addResponseHeader("second-response", "second-response-header"))
                        .uri("http://localhost:8082"))
                .build();
	}

}
first-service, second-service 프로젝트에 mesage()메서드 추가
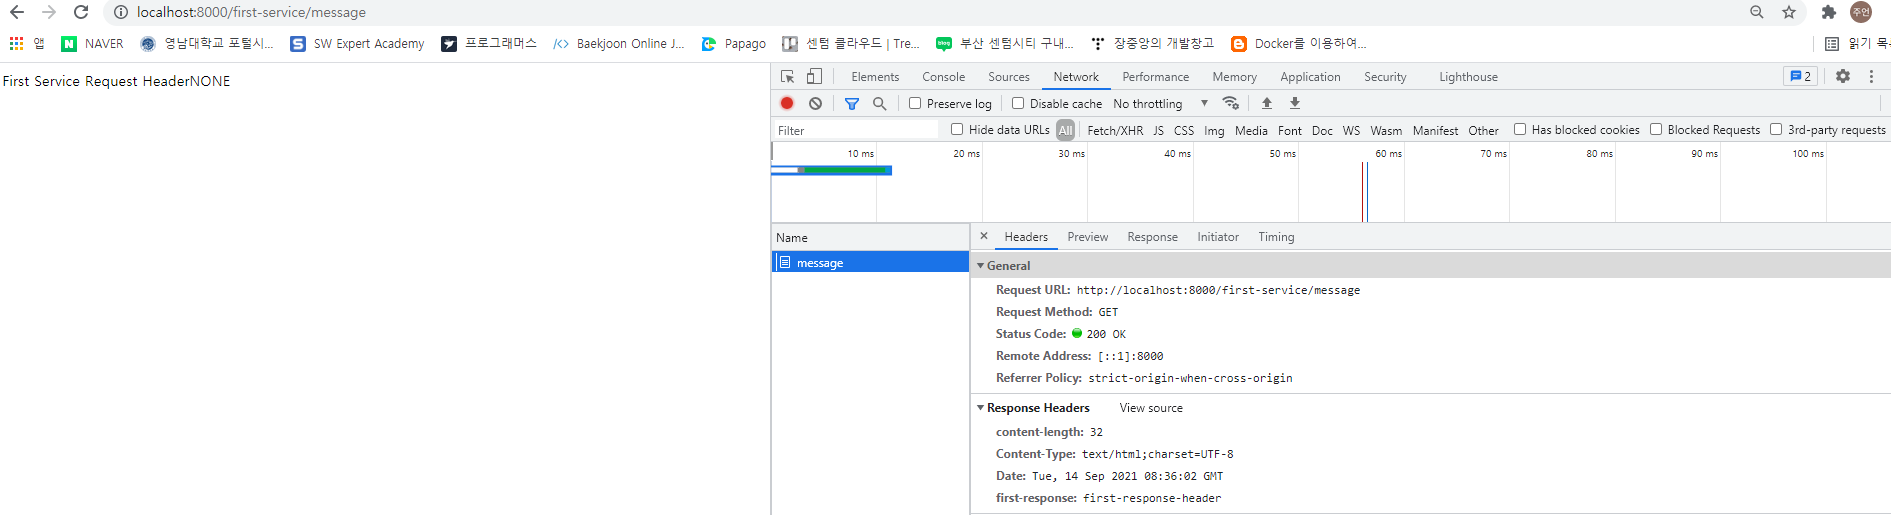
필터에서 추가한 요청 헤더의 내용을 출력하는 메서드
// first-service - firstServiceController

package com.example.firstservice;

import org.springframework.web.bind.annotation.GetMapping;
import org.springframework.web.bind.annotation.RequestHeader;
import org.springframework.web.bind.annotation.RequestMapping;
import org.springframework.web.bind.annotation.RestController;

import lombok.extern.slf4j.Slf4j;

@Slf4j
@RestController
@RequestMapping("/first-service")
public class FirstServiceController {
	@GetMapping("/welcome")
	public String welcome() {
		return "Welcpme to the First service";
	}

	@GetMapping("/message")
	public String message(@RequestHeader(value="first-service", defaultValue = "NONE") String header) {
		log.info(header);
		return "First Service Request Header"+ header;
	}
}
// second-service - secondServiceController
package com.example.secondservice;
import org.springframework.web.bind.annotation.GetMapping;
import org.springframework.web.bind.annotation.RequestHeader;
import org.springframework.web.bind.annotation.RequestMapping;
import org.springframework.web.bind.annotation.RestController;
import lombok.extern.slf4j.Slf4j;
@Slf4j
@RestController
@RequestMapping("/second-service")
public class SecondServiceController {
@GetMapping("/welcome")
public String welcome() {
return "Welcpme to the Second service";
}
@GetMapping("/message")
public String message(@RequestHeader(value="second-service", defaultValue = "NONE") String header) {
log.info(header);
return "First Service Request Header"+ header;
}
}
apigateway-service, first-service, second-service를 실행
apigateway로 접근시 log가 출력되고 response-Header가 변경되는것을 확인

Filter 2. 설정파일을 이용한 Spring Cloud Gateway Filter
기존의 프로젝트에서 수정하여 확인
FilterConfig 클래스에서 Configuration, Bean 어노테이션을 삭제 → 해당 클래스를 일반 클래스로 인식
// FilterConfig
package com.example.apigatewayservice.config;

import org.springframework.cloud.gateway.route.RouteLocator;
import org.springframework.cloud.gateway.route.builder.RouteLocatorBuilder;
import org.springframework.context.annotation.Bean;
import org.springframework.context.annotation.Configuration;

//@Configuration
public class Filterconfig {
//	@Bean
	public RouteLocator gatewayRoutes(RouteLocatorBuilder builder) {
		return builder.routes()
				.route(r->r.path("/first-service/**")
						.filters(f->f.addRequestHeader("first-request", "first-request-header")
								.addResponseHeader("first-response", "first-response-header"))
						.uri("http://localhost:8081"))
				.route(r -> r.path("/second-service/**")
                        .filters(f -> f.addRequestHeader("second-request", "second-request-header")
                                 .addResponseHeader("second-response", "second-response-header"))
                        .uri("http://localhost:8082"))
                .build();
	}

}
application.yml파일에 라이팅, 필터 정보 추가
# application.yml
server:
port: 8000
spring:
application:
name: apigateway-service
cloud:
gateway:
routes:
- id: first-service
predicates:
- Path=/first-service/**
uri: http://localhost:8081
filters:
- AddRequestHeader=first-request, first-request-header-from-yaml
- AddResponseHeader=first-response, first-response-header-from-yaml
- id: second-serivce
predicates:
- Path=/second-service/**
uri: http://localhost:8082
filters:
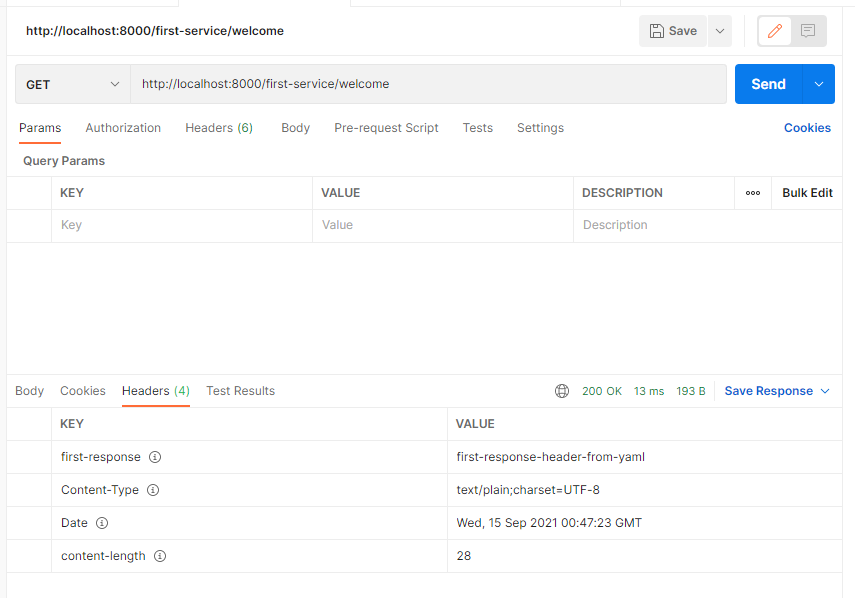
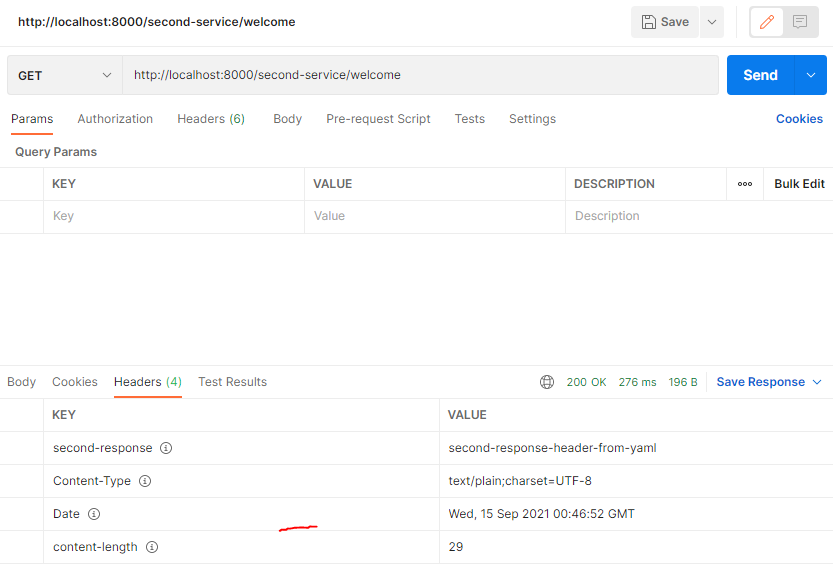
- AddRequestHeader=second-request, second-request-header-from-yamlpostman을 이용하여 apigateway 서비스로 first-service, second-service의 welcome 페이지 요청
apigateway로 접근시 log가 출력되고 response-Header가 변경되는것을 확인
 |
 |
Filter 3. Spring Cloud Gateway Custom Filter
Spring Cloud Gateway Filter의 인증, 로깅, 로케일 변경 등을 처리하는 사용자 정의 필터
요청 아이디(request.getId())와 처리상태코드(response.getStatusCode())를 반환하는 Pre필터와 Post필터를 추가
apigateway-service 프로젝트에 클래스, yml 작업
CustomFiler 클래스 생성
// CustomFilter
package com.example.apigatewayservice.filter;

import org.springframework.cloud.gateway.filter.GatewayFilter;
import org.springframework.cloud.gateway.filter.factory.AbstractGatewayFilterFactory;
import org.springframework.http.server.reactive.ServerHttpRequest;
import org.springframework.http.server.reactive.ServerHttpResponse;
import org.springframework.stereotype.Component;

import lombok.extern.slf4j.Slf4j;
import reactor.core.publisher.Mono;

@Component
@Slf4j
public class CustomFilter extends AbstractGatewayFilterFactory<CustomFilter.Config> {

	// 설정 정보를 제공하는 클래스
	public static class Config {
		// 설정 정보가 필요한 경우 명시
	}

	public CustomFilter() {
		super(Config.class);
	}

	// 필터의 동작을 정의한 메서드
	@Override
	public GatewayFilter apply(Config config) {
		// custom pre filter
		return (exchange, chain) -> {
			// 요청이 전달되었을 때 요청 아이디를 로그로 출력
			ServerHttpRequest request = exchange.getRequest();
			ServerHttpResponse response = exchange.getResponse();
			log.info("Custom PRE FILTER: request id = {}", request.getId());

			// custom post filter
			// 응답의 처리상태코드를 로그로 출력
			return chain.filter(exchange).then(Mono.fromRunnable(() -> {
				log.info("Custom POST FILTER: response code = {}", response.getStatusCode());
			}));
		};
	}
}
application.yml등록
# application.yml
server:
port: 8000
spring:
application:
name: apigateway-service
cloud:
gateway:
routes:
- id: first-service
predicates:
- Path=/first-service/**
uri: http://localhost:8081
filters:
- CustomFilter
# - AddRequestHeader=first-request, first-request-header-from-yaml
# - AddResponseHeader=first-response, first-response-header-from-yaml
- id: second-serivce
predicates:
- Path=/second-service/**
uri: http://localhost:8082
filters:
- CustomFilter
#- AddRequestHeader=second-request, second-request-header-from-yaml
#- AddResponseHeader=second-response, second-response-header-from-yaml
eureka:
client:
register-with-eureka: false
fetch-registry: false
service-url:
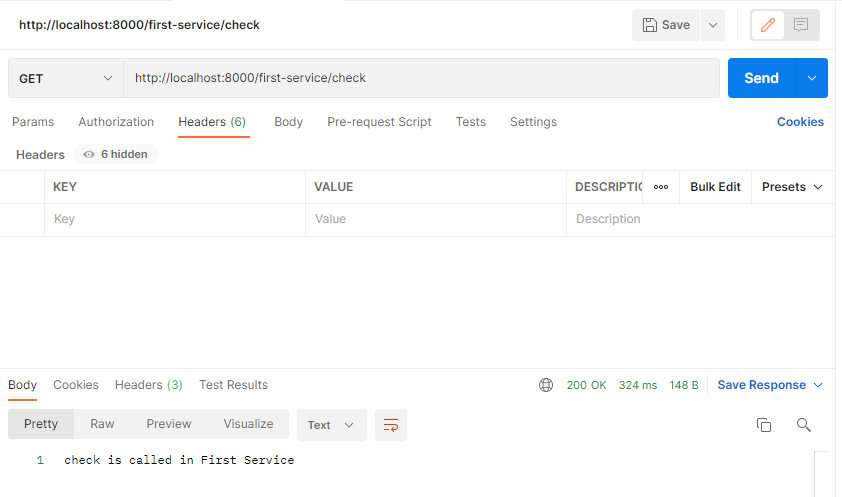
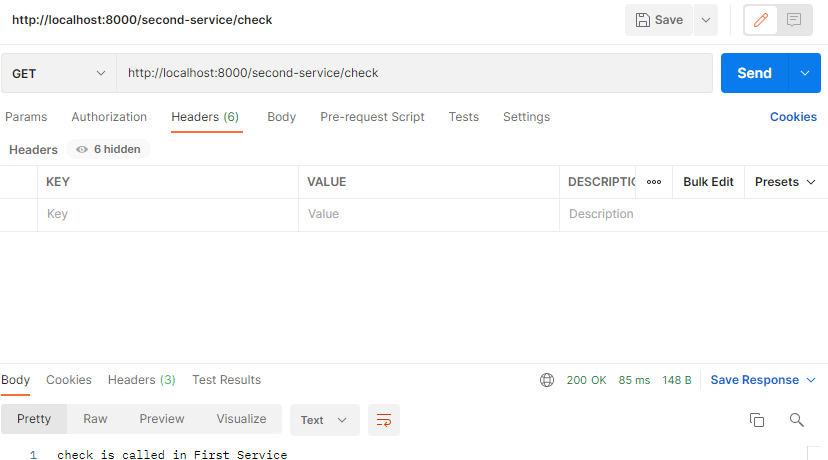
defaultZone: http://localhost:8761/eurekafirst-service, second-service에 check()메서드 추가
@GetMapping("/check")
	public String check() {
		return "check is called in First/Second Service";
	}
apigateway-service, first-service, second-service 재기동
postman을 이용하여 apigateway 서비스로 check 서비스 요청후 동작 확인
 |
 |
 |
 |
Filter 4. Spring Cloud Gateway Global Filter
모든 라우팅에 적용(일반 필터, 커스텀 필터는 특정 라우팅에서만 동작)
공통적으로 적용해야 할 사항을 구현할 때 사용
모든 필터의 시작과 끝에서 동작
apigateway-service 프로젝트에서 수정
GlobalFilter 클래스 생성
코드는 CustomFilter와 유사함
//GlobalFilter
package com.example.apigatewayservice.filter;

import org.springframework.cloud.gateway.filter.GatewayFilter;
import org.springframework.cloud.gateway.filter.factory.AbstractGatewayFilterFactory;
import org.springframework.http.server.reactive.ServerHttpRequest;
import org.springframework.http.server.reactive.ServerHttpResponse;
import org.springframework.stereotype.Component;

import lombok.Data;
import lombok.extern.slf4j.Slf4j;
import reactor.core.publisher.Mono;

@Component
@Slf4j
public class GlobalFilter extends AbstractGatewayFilterFactory<GlobalFilter.Config> {

	// 설정 정보를 제공하는 클래스
	@Data
	public static class Config {
		private String baseMessage;
		private boolean preLogger;
		private boolean postLogger;
	}


	public GlobalFilter() {
		super(Config.class);
	}

	// 필터의 동작을 정의한 메서드
	@Override
	public GatewayFilter apply(Config config) {
		// custom pre filter
		return (exchange, chain) -> {
			// 요청이 전달되었을 때 요청 아이디를 로그로 출력
			ServerHttpRequest request = exchange.getRequest();
			ServerHttpResponse response = exchange.getResponse();

			log.info("Global Filter baseMessage = {}", config.getBaseMessage());

			if (config.isPreLogger()) {
				log.info("Global Filter is start ... request id = {}", request.getId());
			}


			// custom post filter
			// 응답의 처리상태코드를 로그로 출력
			return chain.filter(exchange).then(Mono.fromRunnable(() -> {
				if (config.isPostLogger()) {
					log.info("Global Filter is end ... status code = {}", response.getStatusCode());
				}
			}));
		};
	}

}
filter정보를 application.yml에 저장
# application.yml
server:
port: 8000
spring:
application:
name: apigateway-service
cloud:
gateway:
default-filters:
- name: GlobalFilter
args:
baseMessage: Hello Spring Cloud Gateway Global Filter
preLogger: true
postLogger: true
routes:
- id: first-service
predicates:
- Path=/first-service/**
uri: http://localhost:8081
filters:
# - CustomFilter
# - AddRequestHeader=first-request, first-request-header-from-yaml
# - AddResponseHeader=first-response, first-response-header-from-yaml
- id: second-serivce
predicates:
- Path=/second-service/**
uri: http://localhost:8082
filters:
#- CustomFilter
#- AddRequestHeader=second-request, second-request-header-from-yaml
#- AddResponseHeader=second-response, second-response-header-from-yaml
eureka:
client:
register-with-eureka: false
fetch-registry: false
service-url:
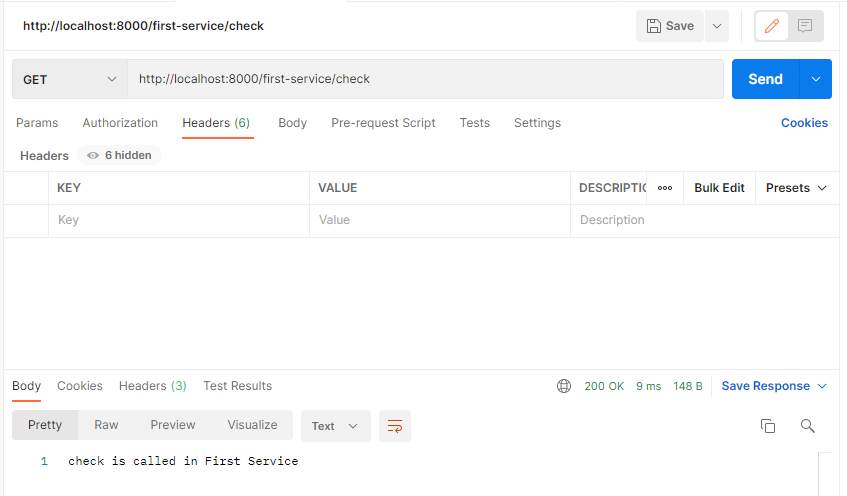
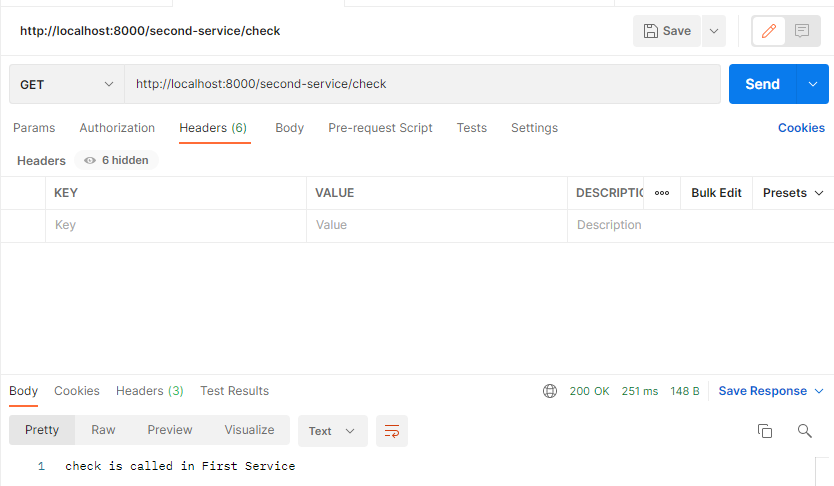
defaultZone: http://localhost:8761/eurekaapigateway-serivce 재실행
postman을 이용해서 apigateway-serivce로 check 페이 요청 후 apigateway-service의 로그를 확인
 |
 |
 |
 |
필터 적용 순서

Spring Cloud Gateway - Eureka 연동
기존에 생성한 Eureka 서버인 discovery-service와 apigatewat-service, first-service, second-service를 연동
apigateway-service, first-service, second-service의 pom.xml 파일에 eureka-client 의존성 포함 여부 확인
| # porm.xml ... <dependency> <groupId>org.springframework.cloud</groupId> <artifactId>spring-cloud-starter-netflix-eureka-client</artifactId> </dependency> ... |
Eureka 클라이언트를 활성화 → apigateway-service, first-service, second-service의 application.yml
| # application.yml ... eureka: client: register-with-eureka: true fetch-registry: true service-url: defaultZone: http://localhost:8761/eureka |
Eureka를 통해서 서비스가 라운팅되도록 apigateway-service의 routes 정보(application.yaml)를 수정
# apigateway-service - application.yml

server:
  port: 8000

spring:
  application:
    name: apigateway-service
  cloud:
    gateway:
      default-filters:
        - name: GlobalFilter
          args:
            baseMessage: Hello Spring Cloud Gateway Global Filter
            preLogger: true
            postLogger: true

      routes:
      - id: first-service
        predicates:
          - Path=/first-service/**
        uri: lb://MY-FIRST-SERVICE
        filters:
          - CustomFilter
      - id: second-serivce
        predicates:
          - Path=/second-service/**
        uri: lb://MY-SECOND-SERVICE
        filters:
          - CustomFilter

eureka:
  client:
    register-with-eureka: true
    fetch-registry: true
    service-url:
      defaultZone: http://localhost:8761/eureka
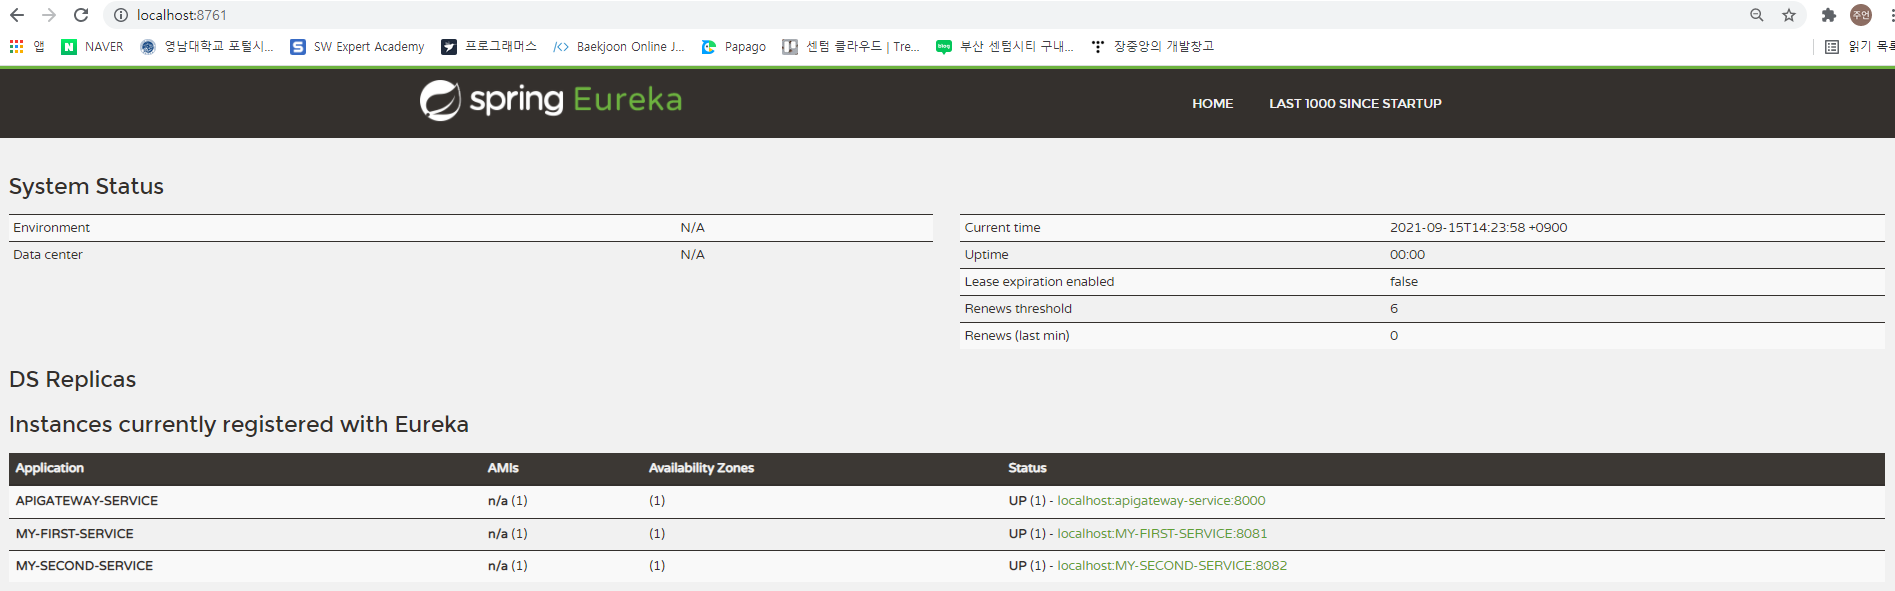
연동 테스트
discovery-service -> apigateway-service -> first/second-service 순으로 실행
인스턴스에 정상적으로 등록되는 것을 확인가능
로드밸런싱 기능
동일한 애플리케이션의 여러 인스턴스로 라우팅이되도록 수정
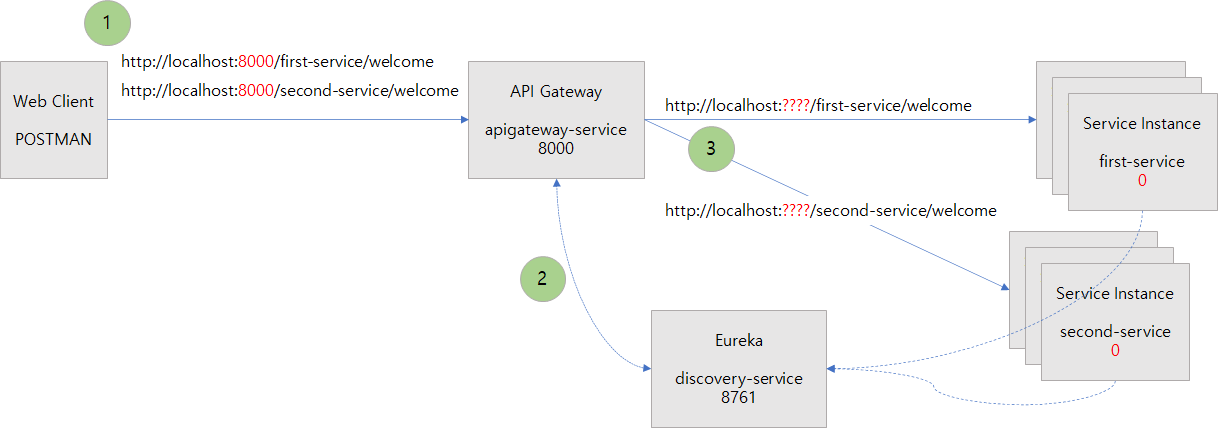
first-service, second-service에 application.yaml 파일에 랜덤 포트를 설정 → 유레카의 인스턴스 ID를 식별 가능한 형태로 설정
# first-service - application.yml

server:
# port: 8081
  port: 0

spring:
  application:
    name: my-first-service

eureka:
  client:
    register-with-eureka: true
    fetch-registry: true
    service-url:
      defaultZone: http://localhost:8761/eureka
  instance:
    instance-id: ${spring.application.name}:${spring.application.instance_id:${random.value}}}
# second-service - application.yml
server:
# port: 8082
port: 0
spring:
application:
name: my-second-service
eureka:
client:
register-with-eureka: true
fetch-registry: true
service-url:
defaultZone: http://localhost:8761/eureka
instance:
instance-id: ${spring.application.name}:${spring.application.instance_id:${random.value}}실행될 여러 인스턴스중 확인을 위해 check()메서드에 현재 인스턴스에 할당된 서비스 포트를 출력하도록 수정(second-service에만 수정)
package com.example.secondservice;
import javax.servlet.http.HttpServletRequest;
import org.springframework.beans.factory.annotation.Autowired;
import org.springframework.core.env.Environment;
import org.springframework.web.bind.annotation.GetMapping;
import org.springframework.web.bind.annotation.RequestHeader;
import org.springframework.web.bind.annotation.RequestMapping;
import org.springframework.web.bind.annotation.RestController;
import lombok.extern.slf4j.Slf4j;
@Slf4j
@RestController
@RequestMapping("/second-service")
public class SecondServiceController {
...
Environment env;
@Autowired
public SecondServiceController(Environment env) {
this.env = env;
}
...
@GetMapping("/check")
public String check(HttpServletRequest request) {
log.info("check is called in Second Service");
log.info("Server Port from HttpServletRequest: port = {}", request.getServerPort());
log.info("Server Port from Environment: port = {}", env.getProperty("local.server.port"));
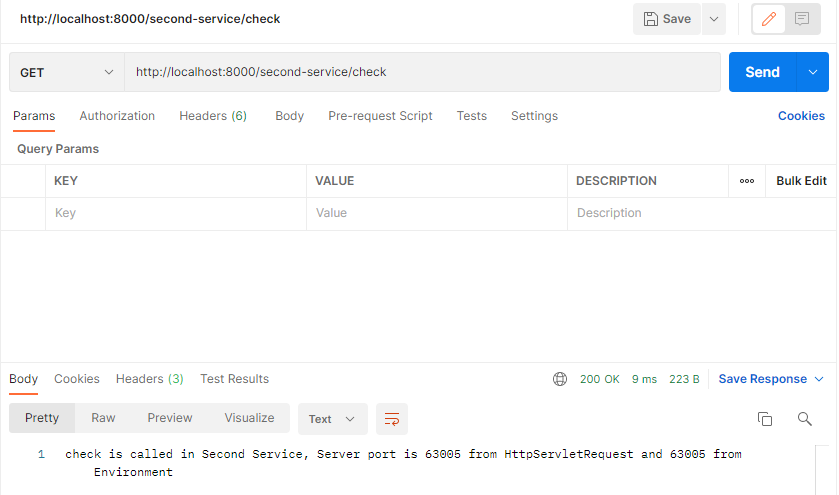
return String.format("check is called in Second Service, Server port is %s from HttpServletRequest and %s from Environment", request.getServerPort(), env.getProperty("local.server.port"));
}
}first/second-service 재기동
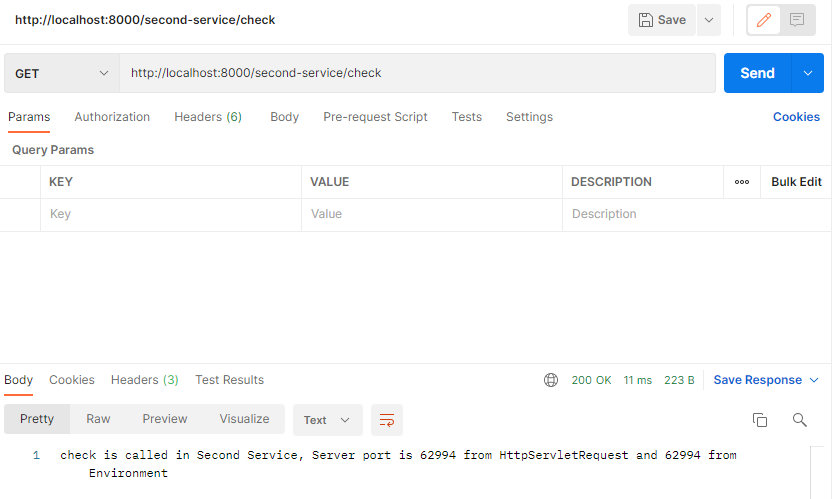
second-service는 확인을 위해 2개 이상 기동 -> postman을 이용해 확인
apigateway-service의 포트인 8000으로 접근시 실행중인 second-service의 각각의 포트를 출력
 |
 |
'Spring Cloud' 카테고리의 다른 글
| Spring Cloud(MSA) 실습 - 웹 쇼핑몰 3. 주문 서비스 및 테스트 (0) | 2021.09.16 |
|---|---|
| Spring Cloud(MSA) 실습 - 웹 쇼핑몰 2. 카달로그 서비스 (0) | 2021.09.16 |
| Spring Cloud(MSA) 실습 - 웹 쇼핑몰 1. 기본 설정과 회원 서비스 (0) | 2021.09.15 |


댓글